Showing posts with label DIY. Show all posts

Friday, April 19, 2013

Now Launching: An Angry Bird-Day Party


Jen Carver, of Banner Events, here to share a fun new "Angry Bird-day" party theme launched recently in honor of two of my sons' birthdays! Feathers were flying at the Carver "birdhouse" as we were busy prepping for 20 guests to come "crash" the party.


December is a busy enough month as is, but add birthdays for two children to the mix and you've got downright chaos. To simplify things this year, we decided to host a combined birthday party for my son Jacob (turning 11) and my son Landon (turning 5). Since they are both huge gamers, we knew this theme would be perfect! I hope you enjoy the colorful photographs, captured by the amazing Karina Rigtrup of A Fresh Take Photography.

INVITATIONS:

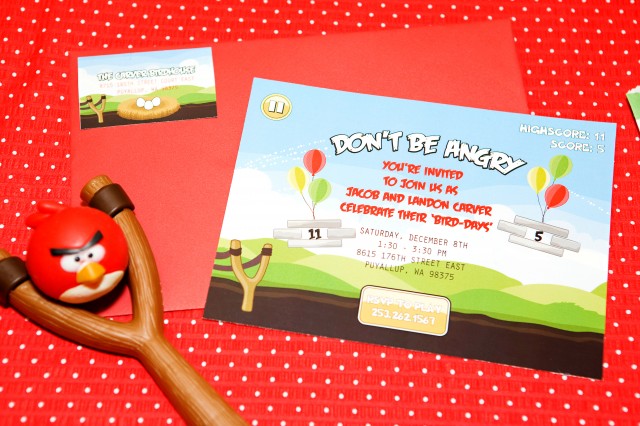
Guests each received these clever invitations designed by the talented Anders Ruff Custom Designs. Maureen did a fabulous job incorporating some fun gaming elements as well as child-specific highlights to the invitations. (I LOVE how the highscore/score reflect my children's new birthday ages! Notice how guests were invited to 'RSVP' to play? So fun!)


UPON ARRIVAL:
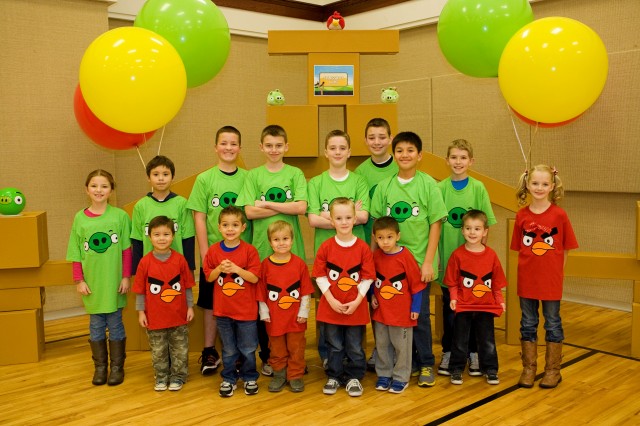
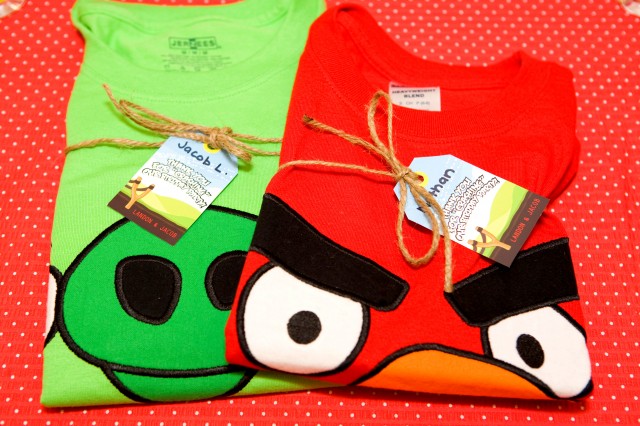
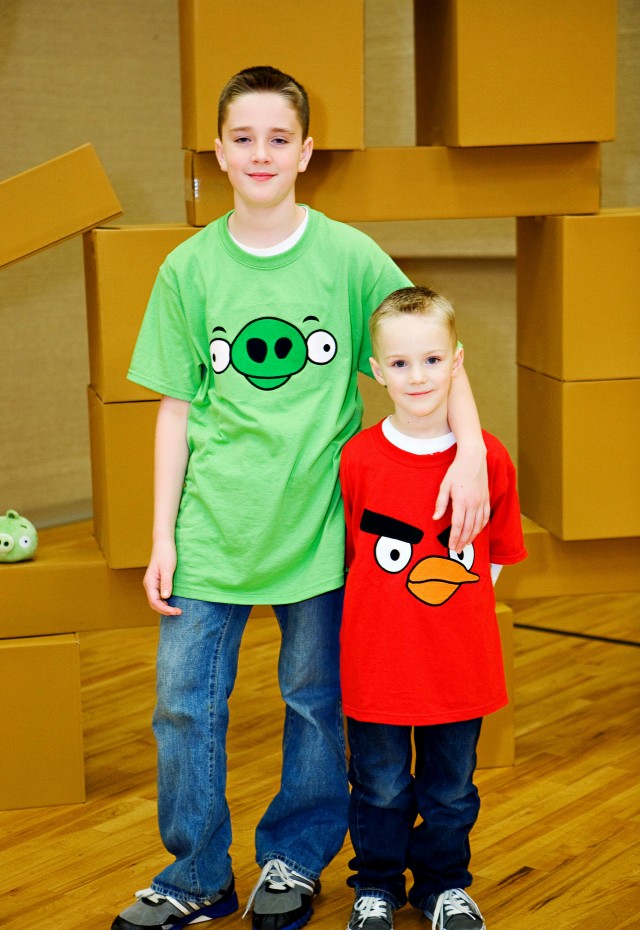
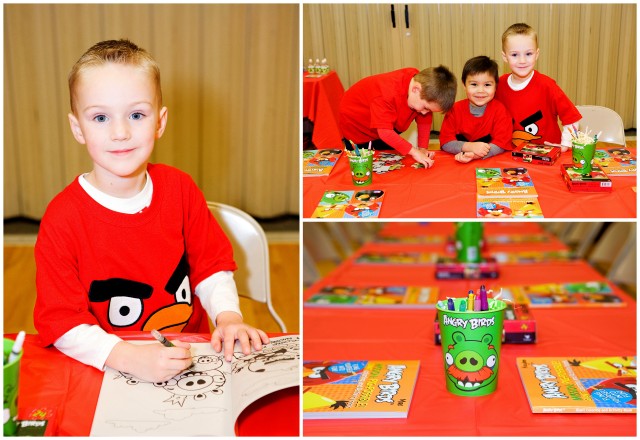
No Angry Bird-day party could possibly be complete without kids dressing the part! Party goers were divided into birds vs. pigs and each received a custom shirt designed and sewn by the talented team over at Create Sew Embellish. Shirts were personalized with a little Anders Ruff hang tag for easy distribution.


DECOR:
Inspired by the popular game, I chose bright colors (red, lime green, yellow & blue) which I carried throughout the styling. I wanted to make the party atmosphere colorful & fun, but also help guests feel like they'd been flung into the game, so we used a variety of materials to bring in some of those natural elements reminiscent from their game playing. You will see artificial grass, bird nests, wooden building blocks used as shelves, wood slingshots, raffia, twine, etc...


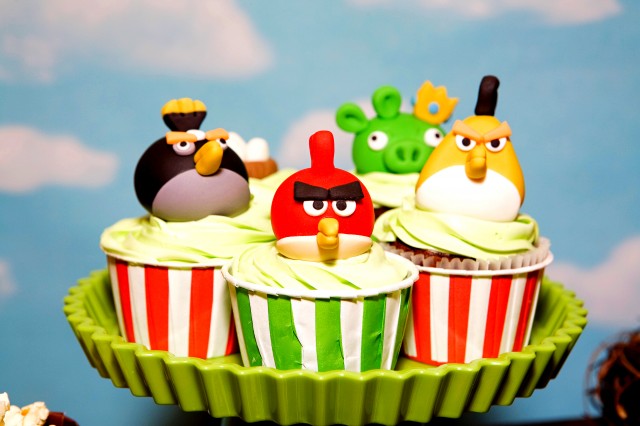
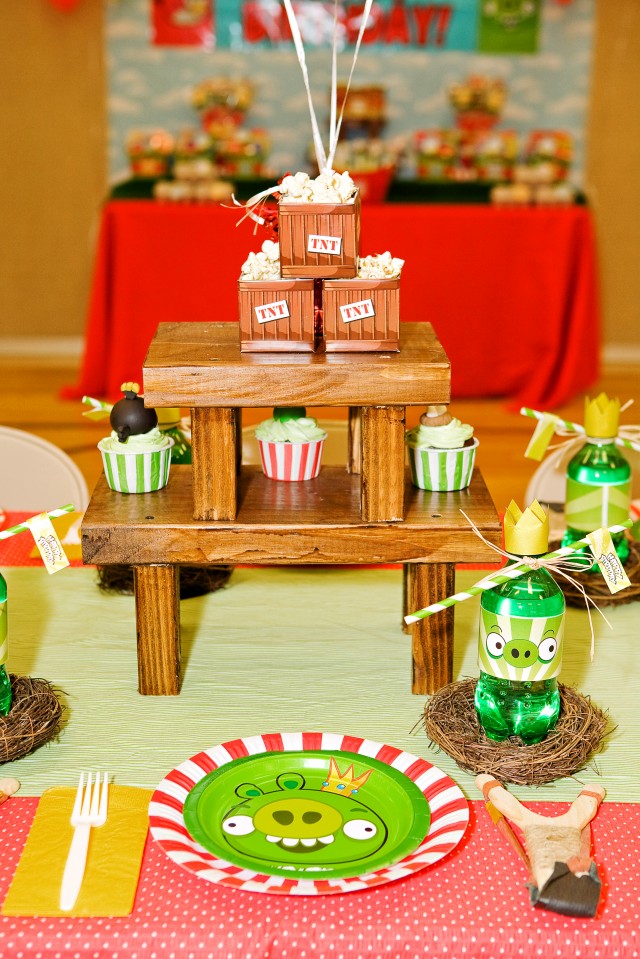
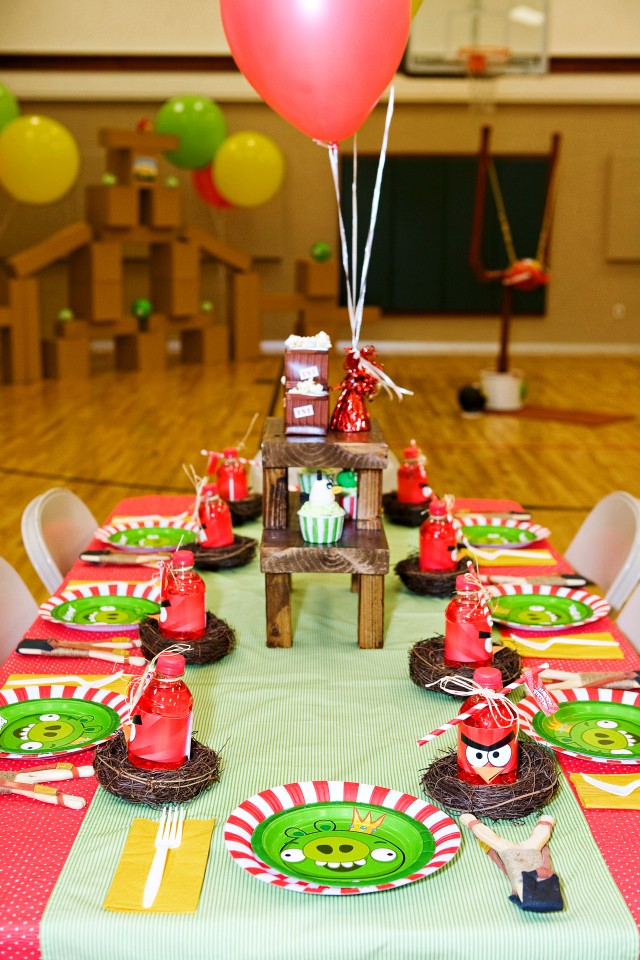
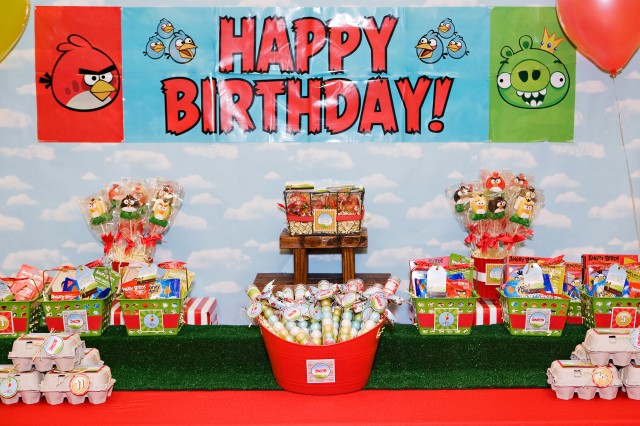
My favorite part of the decor was the dessert table designed to look like a screenshot of the game. Notice the play, pause & high/low score buttons designed by Anders Ruff. Cloud paper served as the background, and the table runner was artificial grass. The addition of the wood stands, built to resemble the wood structures that get knocked over by the birds in the game, really helped to bring the table to life! They were perfect for displaying gorgeous sweet "tweets" from some of our favorite dessert artists.


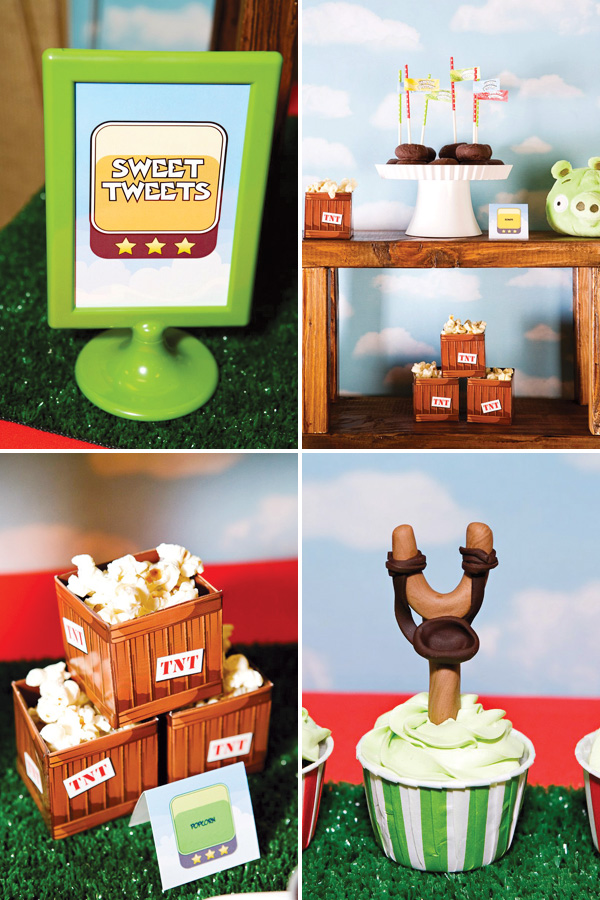
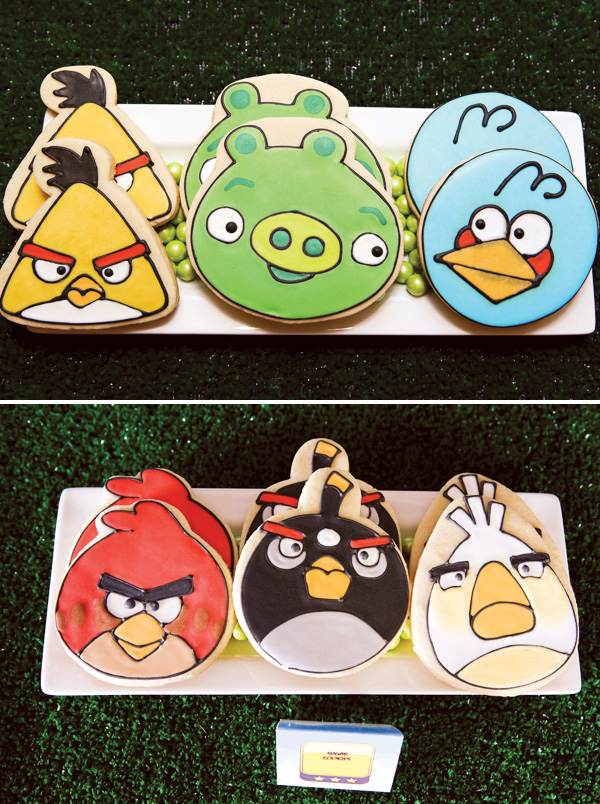
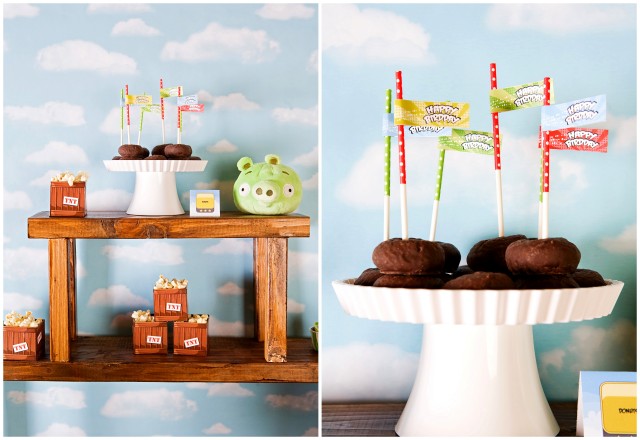
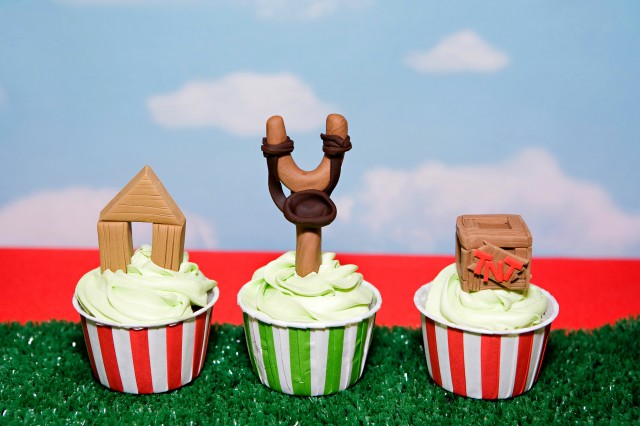
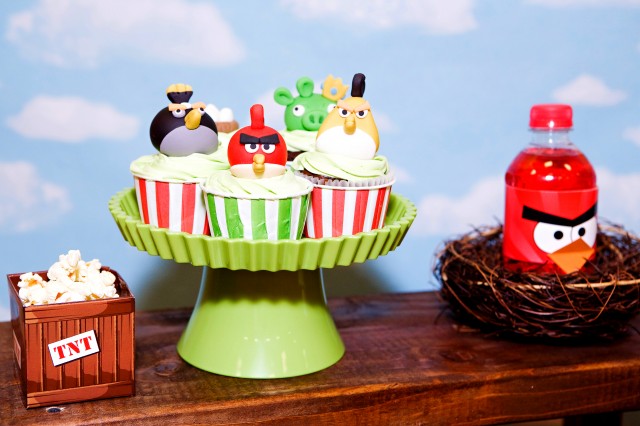
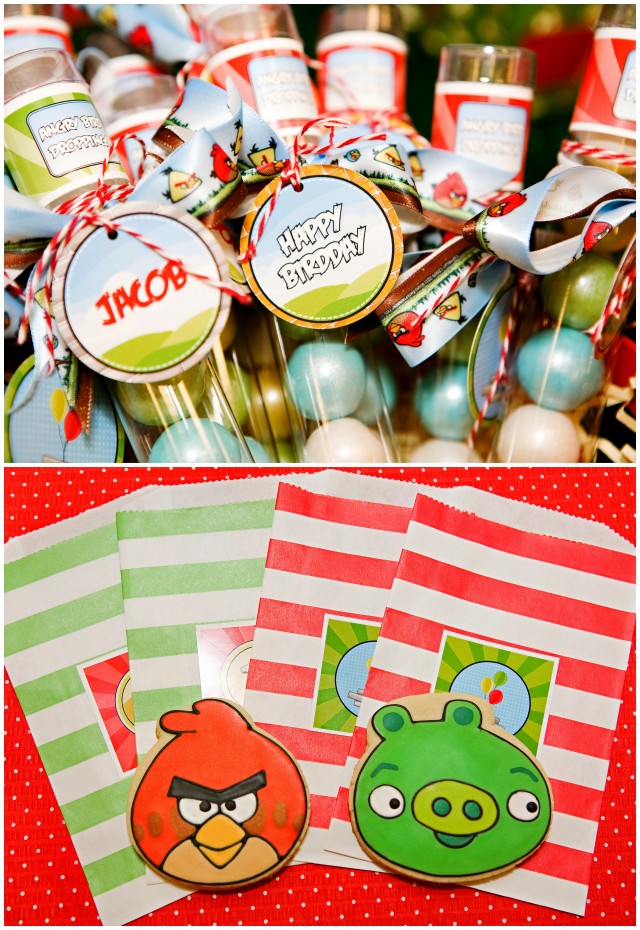
The kids loved the TNT favor boxes filled with popcorn (Anders Ruff), the gorgeous sugar cookies from Sweet Surrender Cookie Co., , the chocolate donuts dressed up with polka dotted treat sticks (SmashCake Studio) and party flags, & the unbelievable fondant topped cupcakes and mint chocolate push up pops from Lynlee's Petite Cakes & Edible Details . Plates were filled and re-filled with these treats!


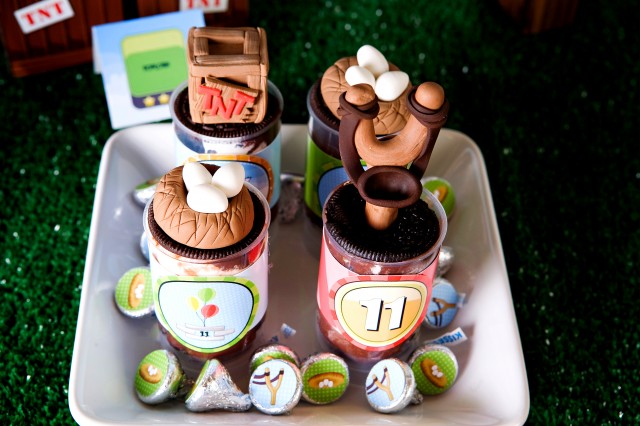
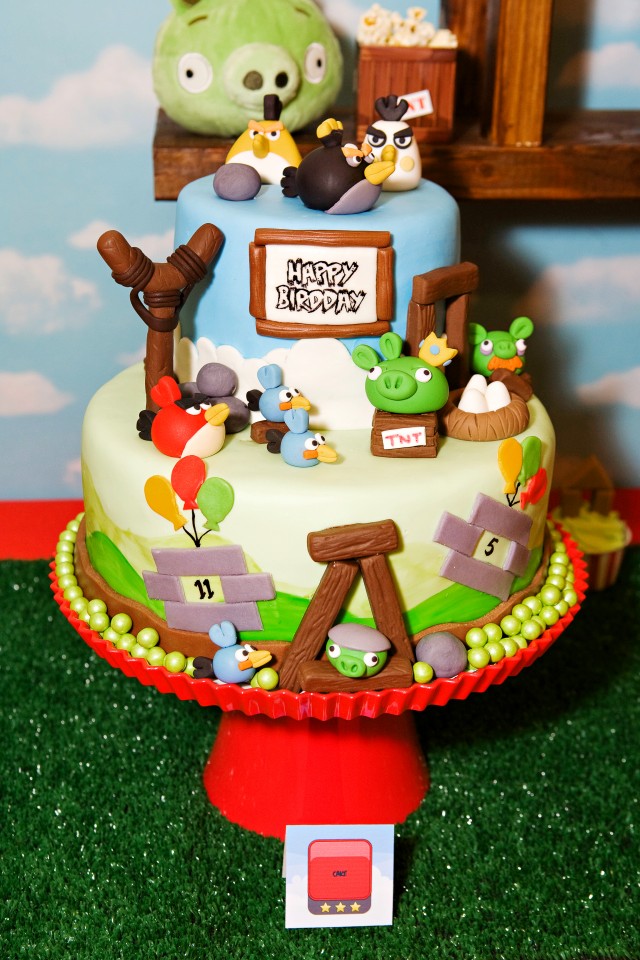
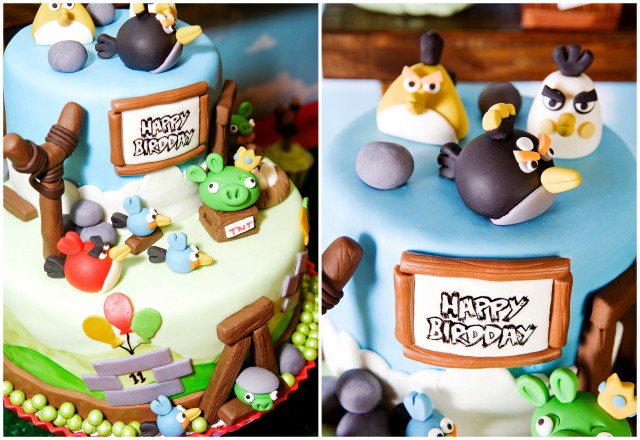
The focal point of the dessert table, was definitely the incredibly delicious two-tiered cake with molded chocolate & fondant scenery designs by 4 Kids Cakes, and 3-D fondant birds and game elements by Lynlee's Petite Cakes.


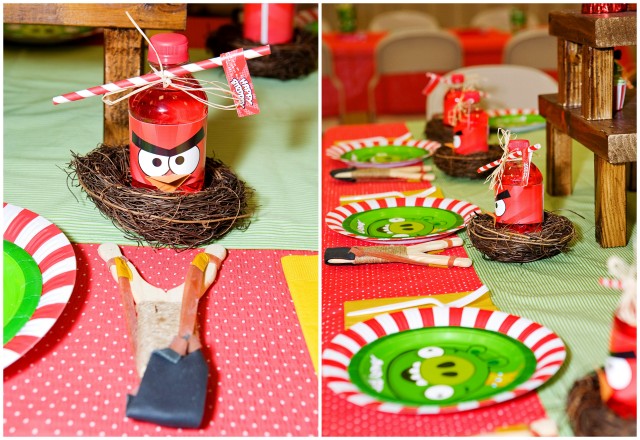
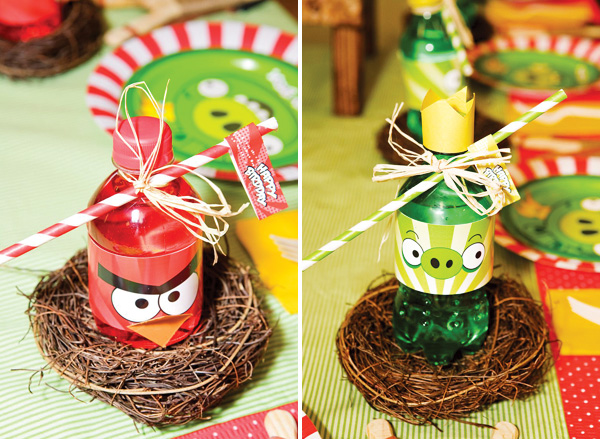
Some of the same dessert table design elements carried over to the dining tables, successfully tying the tables together. Highlights from the dining tables included bird nests at each place setting which housed beverages with colorful custom beverage wrappers & fun striped paper straws & party flags. I added a few DIY details (the beaks on the birds & the crowns on the pigs) for a fun 3-D element. Colorful plates from SmashCake Studio were paired with licensed plates for a fun pop of color, and a slingshot added a bit of foreshadowing for the fun to come!


ACTIVITIES:
Planning a party that will appeal to both 4/5 yr. olds and 11/12 yr. olds can pose a challenge for any parent. I put my thinking cap on and also adapted a few ideas I found while searching the web. Here is our line-up of Angry Birds inspired games.


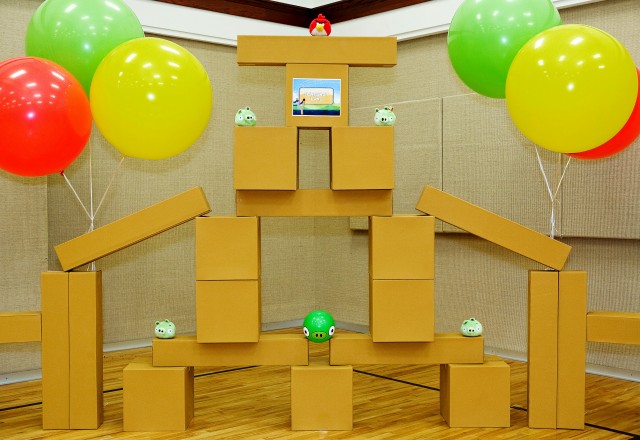
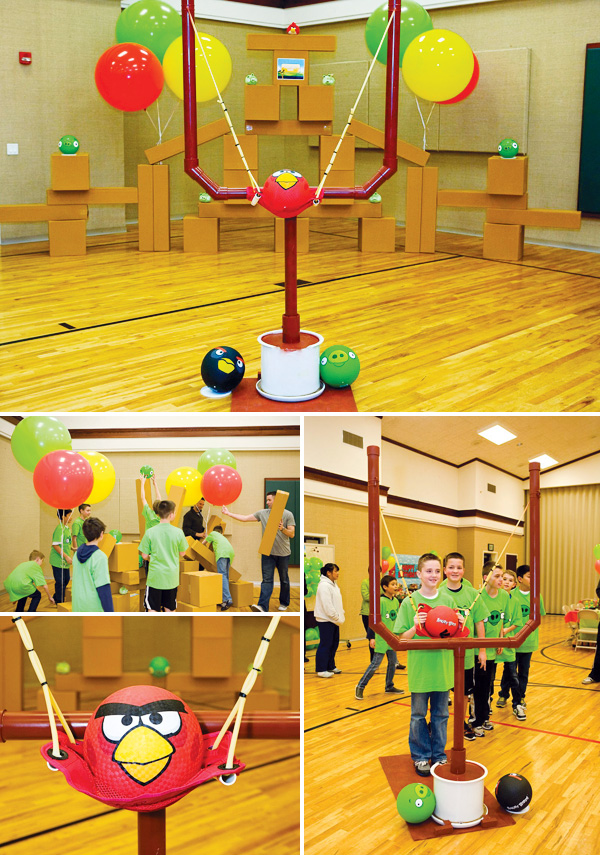
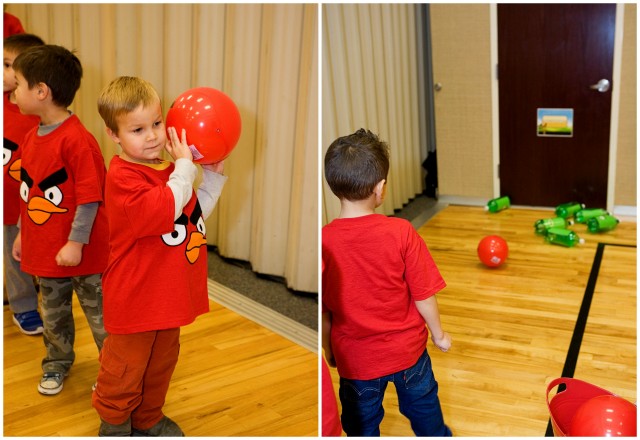
Slingshot Lane: I knew from the start that a "live" action game would definitely be a must. My husband and I decided creating a life size structure including faux wood structures made out of painted moving boxes, pigs, a flying bird and a working slingshot would be the highlight of the party...and it was! I put my handy husband to work on an original design for a 6 ft. portable slingshot using heavy duty PVC pipe, surgical tubing, cement, a ceramic pot & wood base for support. It worked amazingly well! While he was working on the slingshot, I got to work painting boxes I picked up inexpensively from Walmart (about $0.64 each for the square ones) and ordered from ULINE (about $0.81 each for the long narrow ones--6"x6"x36"). We added a handful of plush pigs picked up on clearance at our local grocery store, made a few more pigs using green playground balls from Walmart (only $1.50 each) and this tutorial and purchased a licensed character bird playground ball from Walmart. Voilà! One incredibly fun live action game complete! (P.S. Don't the jumbo balloons add so much colorful fun? Smash Cake Studio carries them in their shop!)


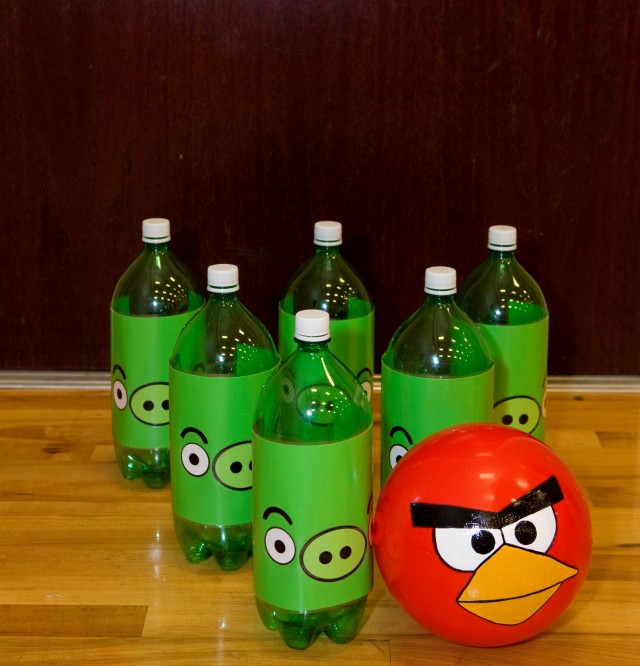
Pig Bowling: This DIY game is not only inexpensive, but also easy. Using a variety of craft punches & scissors, I put together some pig faces using scrapbook paper and laminated them for durability. Simply tape them to rinsed & dried out green 2-Liter bottles to make your pig pins! Using the same tutorial as linked above, I created a red bird bowling ball using a ball purchased from Walmart for $1.50. The younger crowd especially loved this game. They giggled in delight as the pig pins went flying! (Serves those lil' piggies right for stealing the eggs!)


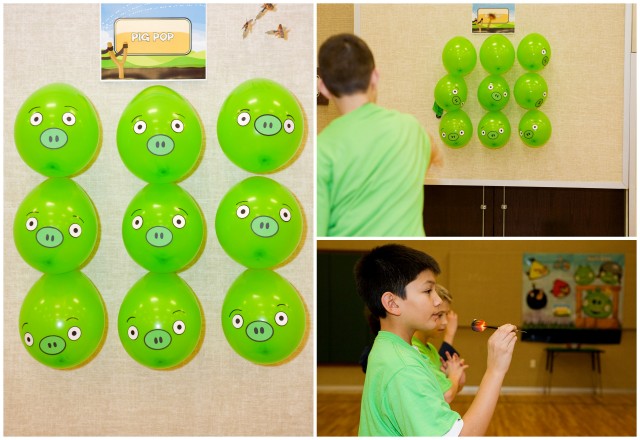
Pig Pop: A classic carnival game, balloon darts are always popular with older kids. We added some pig faces to lime green balloons and created a fun 'pig pop'. You can purchase a cheap set of steel tipped darts (less than $5) from Walmart.


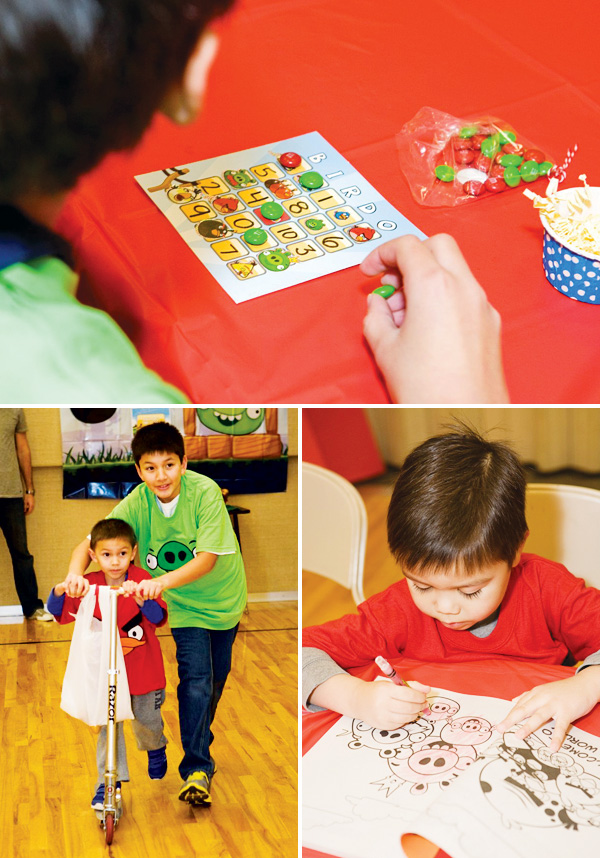
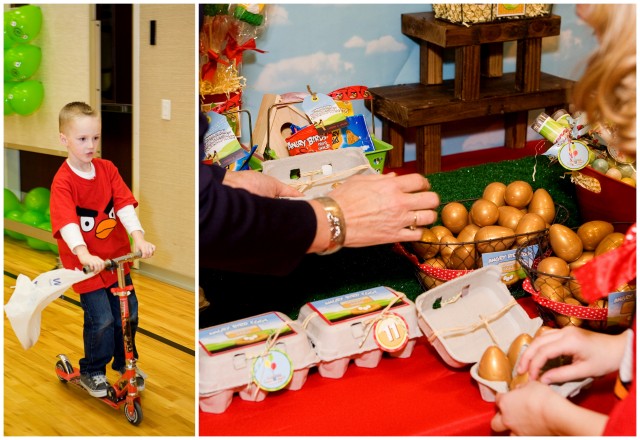
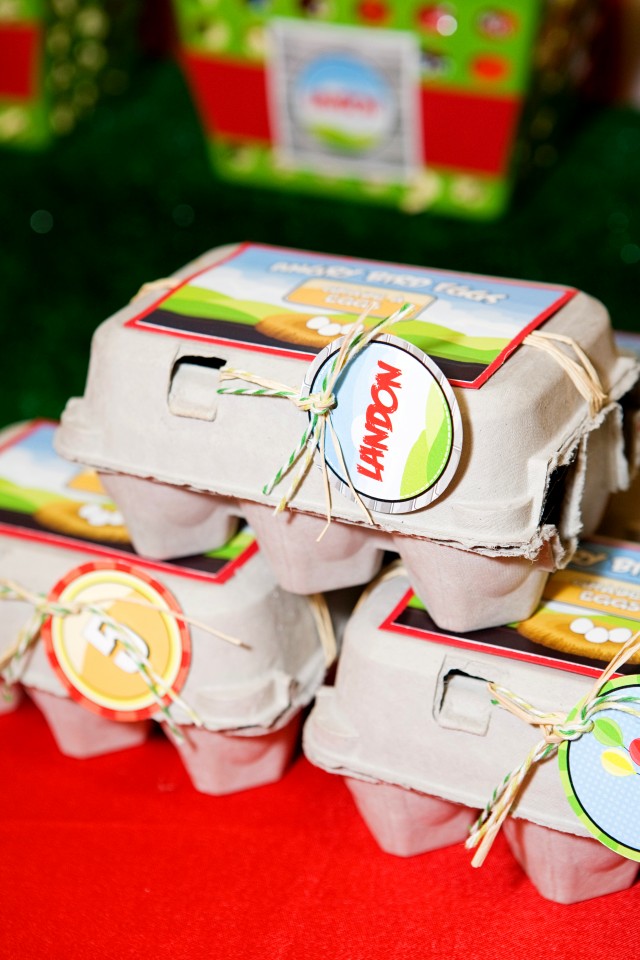
Capture the Eggs: If you've ever played Angry Birds, you know that those bad little piggies stole the eggs from the birds' nests causing them to become angry! In our game, the kids got to capture the eggs back, saving them from being eaten by the pigs! We divided up into mixed teams and hosted a relay race. Contestants rode scooters, rescuing one egg at a time in their sacks. The team with the most rescued eggs at the end of the time, won! Each child was given an embellished egg carton (purchase these darling mini egg cartons from Shop Sweet Lulu) to hold 6 golden Angy Bird eggs (Sunny Bunny Easter Eggs) filled with various candy. These were added to their favors to take home at the end of the party.


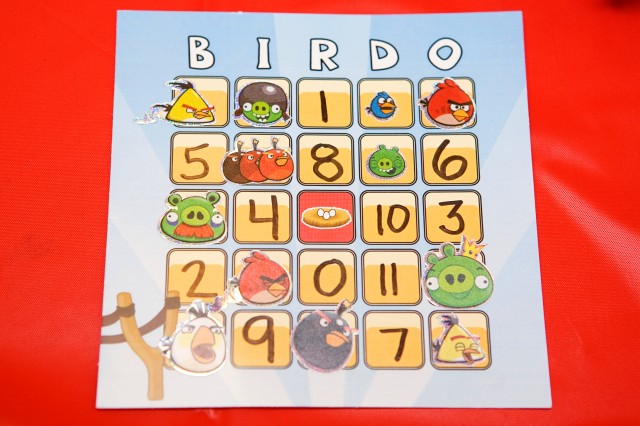
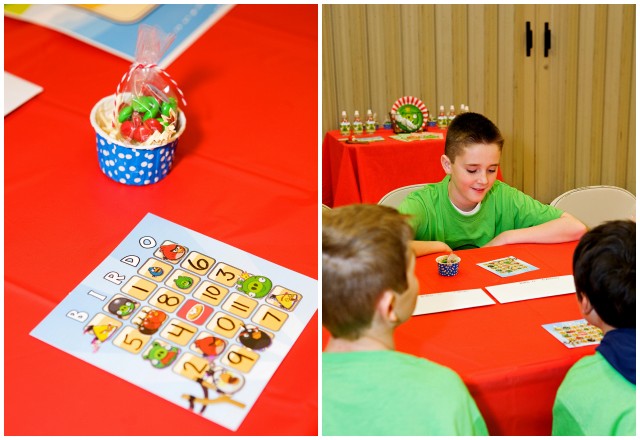
Bird-O ('Bingo'): Another classic party game, Bingo, received a makeover for our Angry Bird-day celebration. Custom blank 'Bird-O' boards were designed for me by Anders Ruff. I added a variety of character stickers and numbers, filled colorful polka dot baking cups from Shop Sweet Lulu with red & green M&Ms to serve as markers, & we were set! Both age groups enjoyed playing this game. Prizes were licensed Angry Birds sticker sheets.


Puzzles/Coloring Activity Station: I always like to have a "self-start" activity center established that gets party goers busy in the celebration from the moment they walk in. A coloring and puzzle station works perfectly. It's easy enough that kids can help themselves while you are still trying to welcome guests, check coats & collect gifts. The Dollar Tree had these licensed puzzles, and the coloring books were found in the dollar spot at Target!
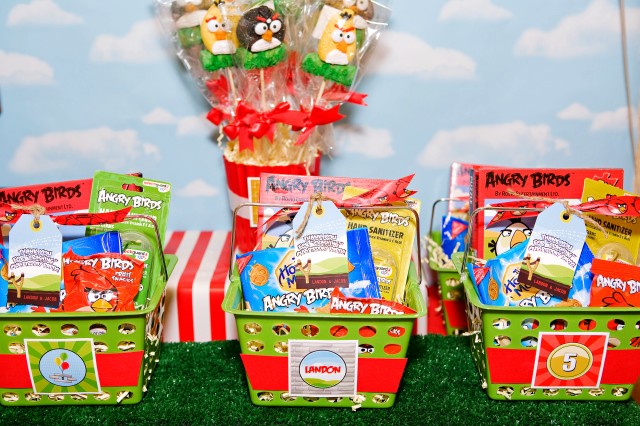


FAVORS:
Guests definitely had to be thanked for 'crashing' my boys' bird-day party, and they certainly didn't leave empty handed. A colorful favor table was set up with a smorgasbord of fun items to take home. In addition to the fun shirts from Create Sew Embellish, guests received green favor baskets filled with many licensed and inspired bird items. (Many of the purchased items were found at the Dollar Tree, including the puzzles and the hand sanitizer. The older boys took home bird houses to sand and paint from JoAnns (only $0.50 each with coupon) and the younger boys took home coloring books. Fruit snacks and crackers helped fill the baskets with some snacks for later. Each guest also got to take home some 'bird droppings'--adorable gumball tubes from Shop Sweet Lulu, filled with shimmer gumballs from Smash Cake Studio & embellished with custom printables & ribbon. With so many birds flying around, there was bound to be a few 'droppings'. Gourmet marshmallows were created custom by the talented The Marshmallow Studio. The kids were excited to select their favorite bird and add it to their favor basket. And finally, all birds need a little 'bird food'--worms! Little cellophane bags of gummy worms were individually packaged up for each friend. I love the treat bag toppers that were made to coordinate!


Vendor Credits:
Jen Carver, Banner Events: Complete Event Styling
Josh Carver: DIY sling shot
Karina Rigtrup, A Fresh Take Photography: Photography
Anders Ruff Custom Designs: Printable Graphic designs
Birds Video Game Invitation/Printables: here
Create Sew Embellish: custom appliqué bird & pig shirts
Shop Sweet Lulu: 1/2 dozen sized egg cartons, gumball favor tubes, polka dot & striped baking cups
Smash Cake Studio: shimmer gumballs, striped paper straws, polka dot candy sticks, 36" balloons, rugby stripe paper sacks
The Marshmallow Studio: custom marshmallow pops
Lynlee's Petite Cakes: custom edible fondant cupcake & cake toppers
Edible Details: custom edible fondant push up pop toppers
4 Kids Cakes: custom cake
Sweet Surrender Cookie Co.: custom cookie favors
Sunny Bunny Easter Eggs: gold plastic Easter eggs

Sunday, April 7, 2013

A Vintage Milk and Cookies Party

Do you 'utter-ly' love milk & cookies? My 2-year old son, Max, does! And what better way to celebrate our little cookie monster's birthday than with a sweet milk & cookies party!

Ready for the best news? Using Anders Ruff's darling 'Vintage Milk & Cookies' printable set, the party prep was simple & inexpensive, & the clean-up was quick! I gave myself a little challenge for this event & pulled off the party prep & planning in a matter of days and with a very limited budget. You can too!


{Doesn't the birthday boy look excited to be wearing his custom shirt by Sweet Threads Clothing Co. ?} {FIVE TIPS FOR EASY & BUDGET FRIENDLY PARTY PLANNING}: I'm sharing some of my favorite tips & tricks for tying an event together with minimal effort, but without sacrificing style or breaking the bank. First: Choose a theme! Choosing a theme early in the planning process helps to eliminate a great deal of stress as it narrows down much of the decision making process. Invitations, activities, decor, party favors, food & color scheme will naturally coordinate with the chosen theme. Once you've decided on a theme, a plan can start to take shape!


As you can see, I chose a darling vintage milk & cookies theme. With my son's current cookie obsession, this theme fit perfectly! The printable invitation & graphics package we chose from Anders Ruff, set the feel of our theme & the color palette. That is the beauty of using printable graphics! They help stylishly and effortlessly guide both the overall feeling of an event & also help tie in the fun little details that will knock your guests' socks off! Lucky for you, Anders Ruff offers printable invitations and party packages in dozens of very unique and popular themes!


'Moo'-ving right along... After last year's big 'First Bee Day' Celebration (seen here), it was nice to keep things simple. Max's grandparents were excited to receive this adorable invitation, perfectly customized for his sweet celebration. The invitation sets the stage for your event & is the first glimpse of your chosen theme that your guests will have!


Second: Take inventory! With your chosen theme in mind, before heading out to shop for your event, look around your house to see what you already have that can be used as is or even repurposed. You will be amazed by what you already have that you can use. Here are a few things I discovered in my home:

  • An antique white farm style beadboard side table from my office was used as the focal point for our dessert display

  • A cherry wood sofa table was used to display additional cookies

  • Ikea jars with metal lids were dressed up with Anders Ruff printable flat labels and housed several yummy varieties of cookies.

  • Wood letters that spell MAX--leftover from last year's party-- got a fresh coat of paint and gave a nice pop of color to our main dessert bar.

  • Old Starbucks Frappacino bottles (donated by a friend) had their labels removed and were sterilized to resemble vintage milk bottles.
  • Remnants of burlap fabric were used to cover tables & wrap milk bottles. {Look how cute the bottles look with a few simple Anders Ruff printable embellishments! 2" party logos were attached to handmade paper rosettes & party flags were attached to darling striped straws!}

  • Twine & clothes pins were used to hang our birthday bunting made by attaching printable banner elements from the printable 'Vintage Milk & Cookies' package to more handmade rosettes.

  • A round glass vase was transformed into a cookie jar (and provided the inspiration for my cookie jar favors) using custom chocolate brown vinyl lettering from A&E Design Works. (Stay tuned for a cookie jar tutorial.)

  • Tablecloths & serving stands/platters were all things I already owned and just had to be washed and set in place. {The gorgeous platter, cake stand and tiered stands you see here are part of a beautiful collection from Willow House with Angie Bytnar.}

  • Craft paper was used for wrapping gifts.
  • Leftover paper shred was utilized for lining cookie trays and embellishing a party hat for the guest of honor.


Once you've gathered things you may be able to use from your 'at home' inventory, make a short list of obvious supplies you may need to either borrow or purchase to carry out your theme. (Color coordinating paper plates, cupcake liners, napkins, etc...)


Third: Window Shop! I love shopping for party inspiration and am always amazed by some of the incredible things there are for purchase that can cut down on my prep time and help pull off my vision. Inspiration can come from just about anywhere! I generally like to start at the local dollar store to see what items from my list they may have. (I usually find quite a bit there!) Of course, craft stores, such as JoAnn, Michaels and Hobby Lobby are a must. Purchases made at these locations can be great, especially if you utilize the plethora of coupons that can be pulled from local newspapers or printed from online. Thrift stores, grocery stores and discount stores like Ross & TJ Maxx are also full of great party finds. Typically, I go from store to store with my notepad & pen & make notes about the things I see. I generally don't buy anything on my first trip, and try to discipline myself into just jotting down specs about possibilities. This keeps me from overbuying and/or spending too much on items that I may find cheaper at other stores. (Of course, if there is an incredible sale or a must-have item that has low inventory, you may consider purchasing it on the spot, especially if there is a good return policy.) For this particular party, I found the following things from the Dollar Store:
  • small glass bowls that would be fashioned into my take home cookie jar party favors
  • cookies (Famous Amos for filling the cookie jars, fudge striped cookies, etc...)


Fourth: Purposefully Shop. With your notes in hand, return to the stores where you found the greatest deals for the items needed. Be sure to consider which things best meet both your party vision and your budget restrictions. (It's always a good idea to save receipts in case you don't end up using something or find an unexpected deal at a future date.) Anything you couldn't find locally, may now be purchased online. I found several fun prop items already on sale at Michaels & JoAnns and was able to use additional money saving coupons. I also scored a few clearance items at Target. Things I purchased included:
  • Hay bales for the dining table centerpiece and dessert table

  • Galvanized bucket and milk jugs for displaying cookies & milk.

  • Mini wooden crates for each place setting & for the dessert bar.
  • Large wooden crates for adding height/levels to my display and a rustic touch.
  • Ceramic cows & milk cartons for a touch of whimsy.


Fifth: Simplify Food/Dessert Prep. Unless you absolutely love slaving away in the kitchen, give yourself permission to purchase some of the food/desserts. It's a good rule of thumb to opt for a few tried & true homemade items that are crowd pleasers & also make for a great presentation. Then, fill in the rest of the needed food/desserts with some prepared store bought items that require minimal prep & mostly need some simple styling/arranging. From those purchased items, I like to splurge on 2-3 specialty/gourmet items for that added WOW factor. These specialty items generally serve two purposes--they act as a dessert & due to their custom nature, also usually function as part of the decor too! How did I do this for our 'Milk & Cookies' party? By sticking to a simple 'milk & cookies' theme, it meant I didn't need to do a huge dessert table. I chose a couple of favorite recipes we'd make--my husband's whoopie pies and my Oreo truffles.


From Costco & Walmart, we purchased some prepackaged cookies and found fun ways to arrange them.


Our fun 'splurge'/ gourmet items were these gorgeous cookies from Sweet Goosie Girl and CookieXchange, as well as incredible fondant cupcake toppers from Fondant Flinger, all of which were custom designed to coordinate with both the colors of our event and the printable graphic package.


We kept our party favors simple & edible too, and by coordinating them with the party colors, we got twice the bang for our buck because they served as part of the decor until they were taken home by guests!


  • Cute chocolate and white striped sacks with coordinating party printables were available for take away treats. Family members loved being able to select a few extra cookie favorites to take home for later.

  • Guests also got to take home the mini cookie jar favors from their place setting.


We had a wonderful day celebrating one sweet little boy.


Vendor Credits:
Event Styling: Jen Carver, Banner Events
Printable Graphic Designs: Anders Ruff Custom Designs
Invitation here:
Party Printables here:
Custom Shirt: Sweet Threads Clothing Co.
Custom Milk Bottle Cookies: Sweet Goosie Girl
Custom Monogram Cookies: CookieXchange
Custom Fondant Cupcake Toppers: Fondant Flinger
Custom Vinyl (for cookie jar favors): A&E Design Works
Striped Straws/Cupcake Liners/Polka Dot Balloons/striped sacks: Smidge and Pinch & Hey Yo Yo
Servingware: Willow House with Angie Bytnar
Photography: Mi Vida Photography by Rebecca Pierce
Supply Resources:
Michaels: hay bales, sm./lg. wooden crates, terra cotta saucers, galvanized metal milk jugs & container
JoAnns: striped fabric, burlap, wood knobs, jute, ribbon
Dollar Tree: glass bowls (for cookie jar favors)
Target: ceramic cows & milk carton