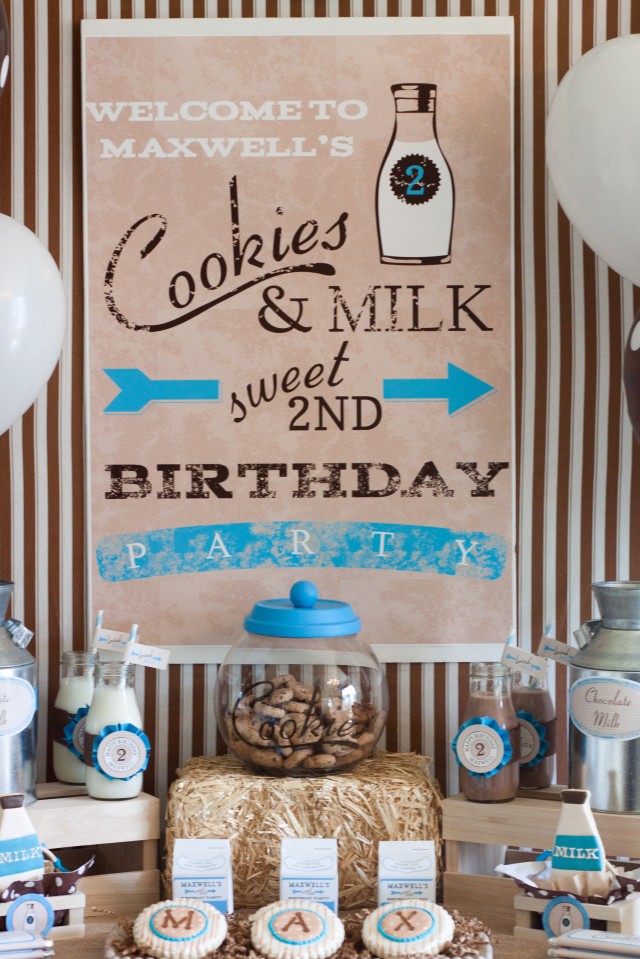
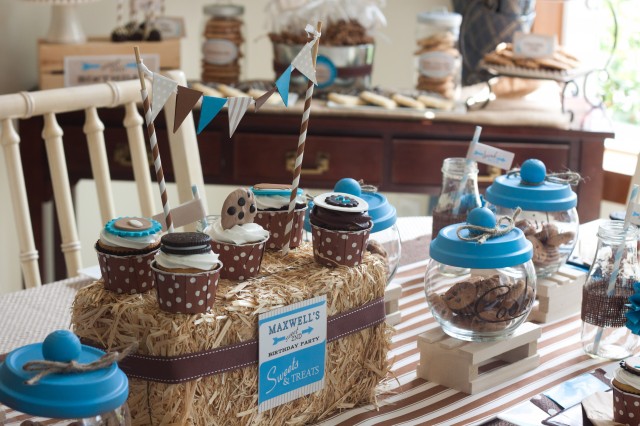
Today I am sharing with you a simple tutorial for making your own cookie jar party favors as seen here in my recent 'Vintage Milk & Cookies' party.

{I adore AR's party printables which provided the inspiration for the cookie jars!}
I think I can safely say that creative & fun party favors are a 'must' at any party. I am always trying to think of something unique and memorable that I can send home with my guests as an extension of the party theme. After all, I want guests to be thinking of my event long after the party is over. Finding something premade that coordinates with your theme and/or colors is not always an option. Sometimes you have to take matters into your own hands. I am discovering that DIY party favors are fun and can even be economical.
You may remember the adorable gumball machines Adria and Maureen made for their dessert table styled for Universal Studio's Hop DVD release at Target last year. The basic concept for the cookie jar favors is similar.
Here is what you need to recreate the cookie jar favors:

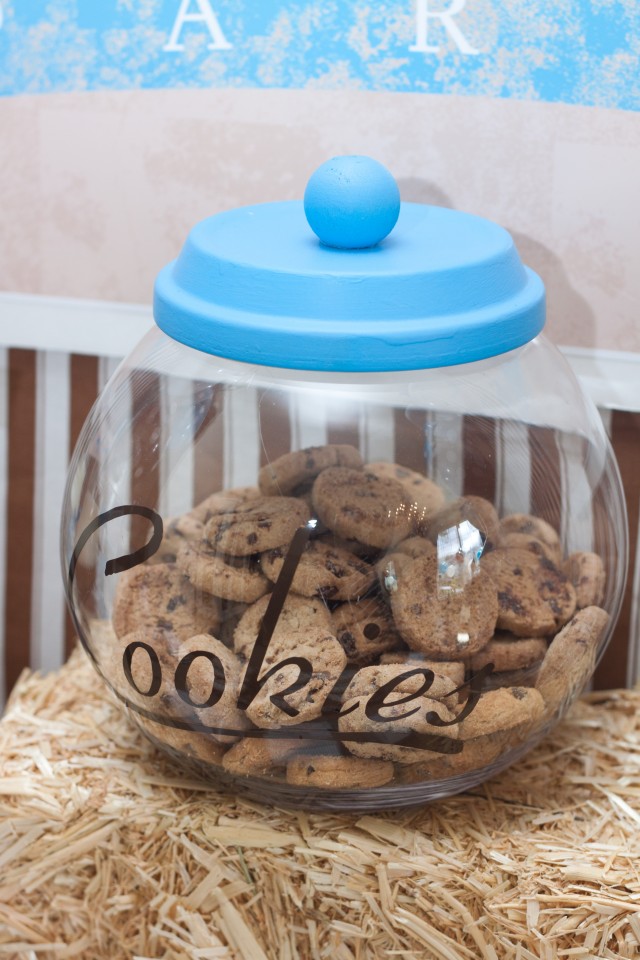
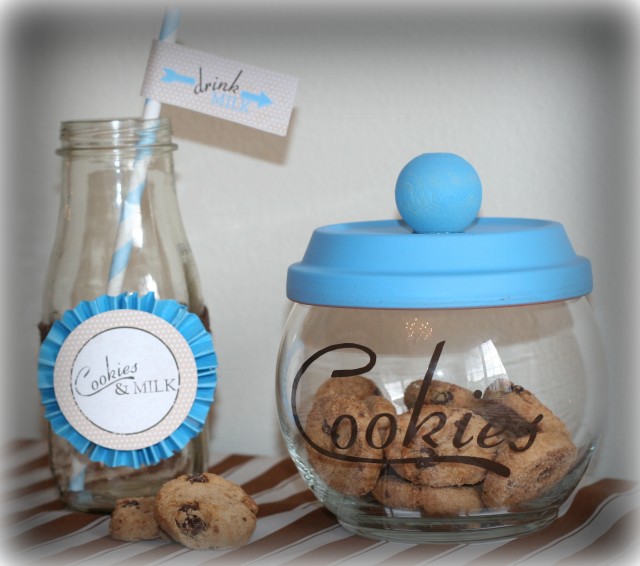
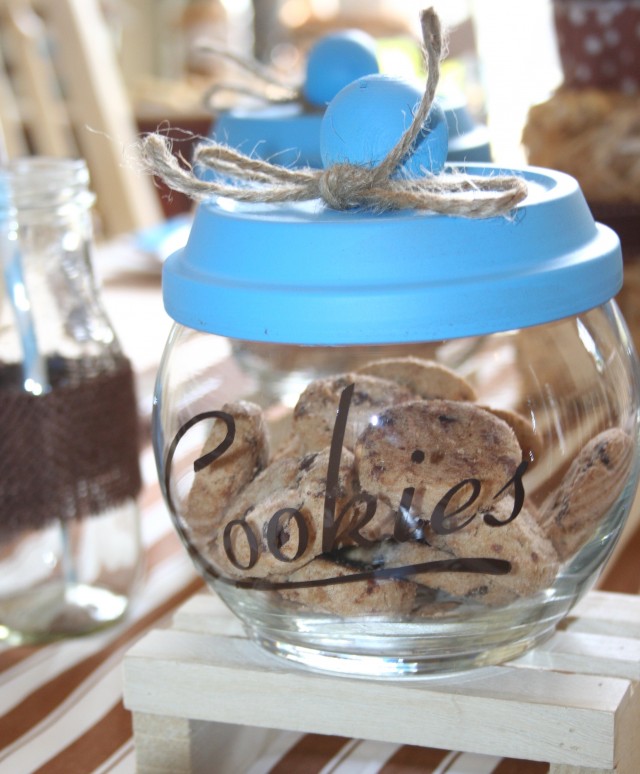
- Glass bowl (I found the small favor sized bowls at the Dollar Tree for $1 each. For the larger dessert bar size, a fish bowl would work well.)
- Terra cotta base to use as the cookie jar lid (get the appropriate size to fit the top of your glass bowl)-- I purchased mine at Michaels for less than a $1 a piece + used 40-50% off coupons on each one
- Wooden ball (flat bottomed)-- (I purchased mine at JoAnns with a coupon in an economy pack.)
- Vinyl lettering spelling out 'Cookies'-- Amy of A&E Design Works recreated the adorable text from the Vintage Milk & Cookies package to coordinate perfectly.
- Spray paint (choose a color to coordinate with your event). *Note: I tried brushing on acrylic paint and strongly advise against it. Spray paint is best for a quick, even coat.
- Permanent glue (I used a glue gun)
- Mini cookies (We picked up Famous Amos brand at the Dollar Tree. 4 pkgs/$1) Mini Chips Ahoy also work well.
Directions:
Before starting, be sure to remove any labels/price tags and thoroughly clean all items with hot, soapy water. Dry completely.
1. Spray paint the terra cotta base and wooden ball. It will take a few coats. (Note: Do not spray paint what will be the inside of the cookie jar lid.)
2. Once the painted pieces are dry, glue the wooden ball to the center top of the terra cotta lid using the glue gun.
3. Carefully rub the vinyl with your finger (or a wooden craft stick) and peel vinyl off of it's sticker backing.
4. Eyeball (or measure) a good 'center' location for your vinyl lettering on the glass jar. Carefully begin transferring it to the glass bowl. (Vinyl is very forgiving, so if it needs fixing, slowly peel it up and adjust.
5. Fill with your favorite mini cookies! Replace the lid, and voilà, a custom cookie jar favor!

Visit the full Vintage Milk and Cookies party shoot here for more fun ideas!
CREDITS:
Styling: Jen Carver, Banner Events
Inspiration: Anders Ruff Custom Designs Vintage Milk & Cookies printable package
Vinyl Lettering: A&E Designworks


2 comments:
Pretty section of content. I just stumbled upon your website and in accession
capital to assert that I acquire actually enjoyed account your blog posts.
Anyway I will be subscribing to your augment and even I achievement you access
consistently quickly.
Here is my web-site - mens stuhrling original watches
it's so cute and the colours are lovely.Love the idea with the hay.great job!
Post a Comment